
Wednesday, 8 January 2014
Today we learnt InDesign deeper.
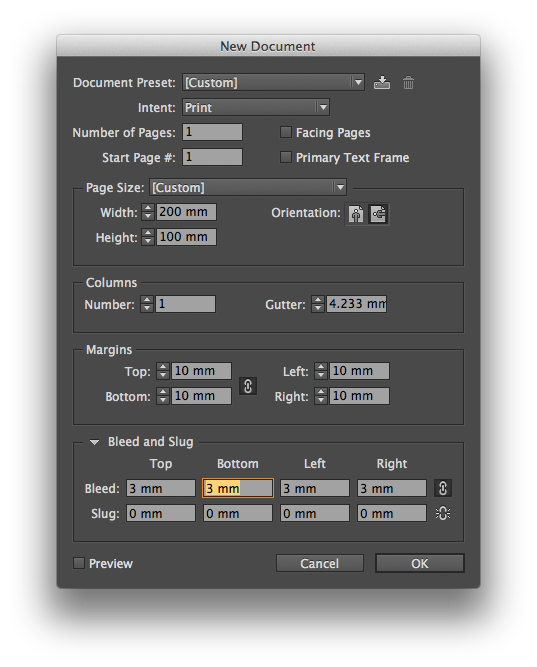
1. Column and Row

 |
| Tips: changing the units into millimetre makes it easier |

 |
| Saving the document to reduce the bad possibilities |
 |
| Starting to make margin and column |


 |
| Create Guides |
 |
| The ideal number of column is from 12 to 14 |


 |
| If i click fit guides to margin it would be like this: |

 |
| You also can editing the guides by clicking the guide's line. |
 |
| To delete the guide, just click the delete button after you click the guide |
 |
| This is the guides that's from the computer |


 |
| But i think it's too complicated and confusing so my tips is just create your own guides. |
 |
| Then I'm trying to do this exercise |


2. Master Page


 |
| Master Page is for customising the page that you want to customised. |
 |
| So, I've made the 2nd master page (B Master) |
 |
| This is what I've talking about, I want to customised the B Master using 14 column |
 |
| To apply the page that you want to make it as the B Master, just drag the B Master and drag it to the page that you want to apply. |
 |
| Before you customised it, don't forget to click the right master page! So this is my B Master page. |
 |
| A Master |
 |
| for example I want to make an ellipse as the page template |
 |
| make sure you edit it on your master page |

 |
| and you can see every page (that use the B Master) is using the same template |

 |
| This is how to create a page number. First, create the text box. |

 |
| you can place the page number |

 |
| Tada! |
4. Create some frame


 |
| Text frame |
 |
| Unassigned frame |
 |
| Graphics frame |
 |
| polygon |

 |
| Colouring the frame |


5. Placing the image


 |
| make the box |
 |
| click the circle button one to adjust the size of the image, not the box |
| you could editing the image place by using this tool bar (5 on the right one) |
 |
| I was having some experiment and trying to know the different |
6. Text warp
 |
| format the image. I was editing the image and remove the background |
 |
| open the image on InDesign |
 |
| make a text |
 |
| appear the text warp toolbar |
 |
| place the image in front of the text |
 |
| click the button |
No comments:
Post a Comment