
Wednesday, October 23rd 2013
Today we learnt Adobe Illustrator ;-)
but the learning process for today was less conducive because the light's off and we couldn't go anywhere (fx's restaurants and class in fx were full), so we only had 2hrs of class.
So, what I've learned from today were..
L1: Basic Shapes
I've learnt how to make an elips, square, star, etc.

first, choose the Rectangle Tools on the left side, and hold so it appears some choices of shape that you want to choose.


for the Rounded Rectangle Tool, if you want to make the edge looks more blunt, while you make the shape, hold the mouse (or pointer) and click the up arrow on the keyboard. if you want to make it sharper, click the down arrow.
It's also applied on the Polygon and Star Tool. The difference are the up arrow button is for adding the side, and the down arrow button for lessen the side.
how about adding the colour on the shape? it's easy, there are 4 ways:

stroke is for the line's thickness.


they were located on the right side.

the pink one is for the fill the black one for the stroke/line
I also learnt how to..
- zoom in & zoom out: 1) press option and scroll up/down 2) press command and +/-
- fit to page: command and 0
- adding artboards
L2: Line Segment Tools
click and hold Line Segment Tool, choose what kind of line that you want to make.

if you want to add the spiral and the spider web, the step's same like adding the edge of star and polygon tools.
L3: Color Target Choose


before choosing the Eyedropper Tool on the left side, select the Selection Tool (click v) on the left side and select the object that you want. After that select the colour that you want. The object will turned into the colour that you've choose.
L4: Scale
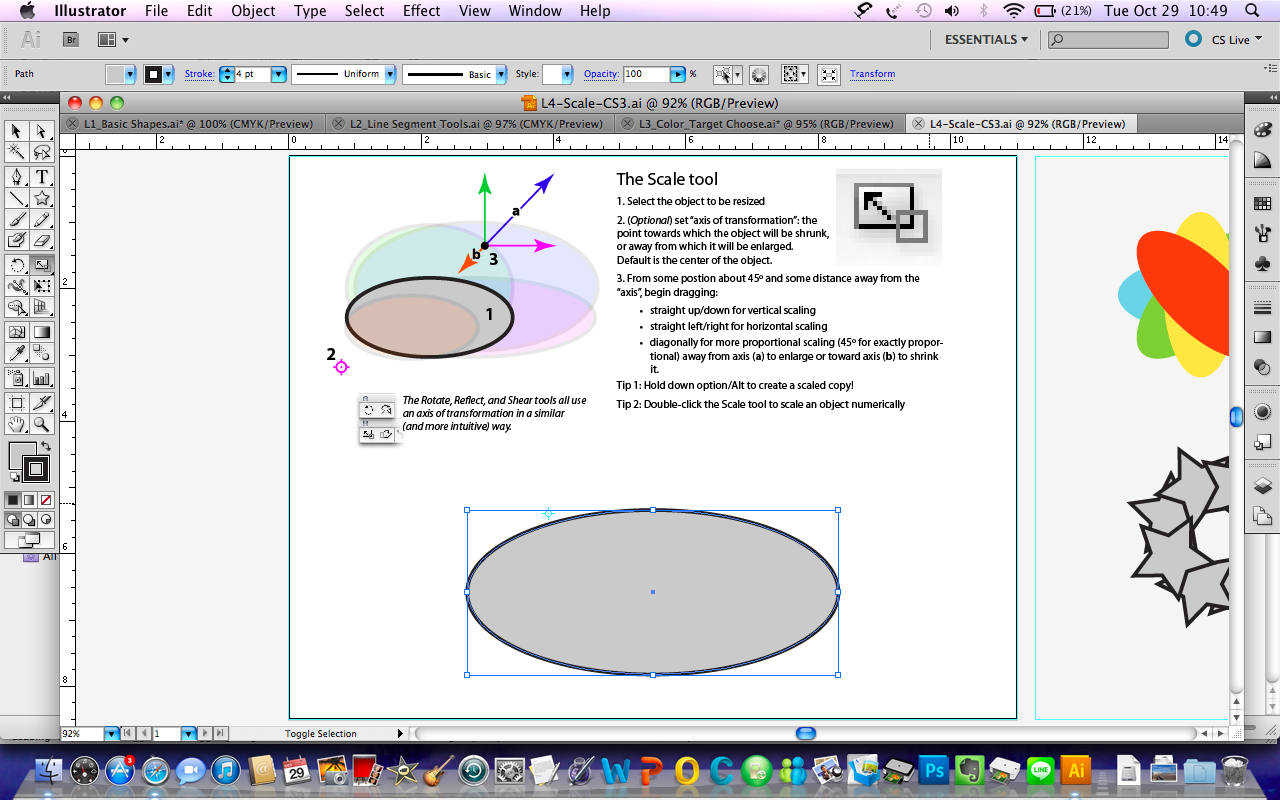

Scale Tools is for making the shape bigger, smaller, taller, shorter, and friends. First, you have to choose the object, then click the scale tools on the left side. After that just play with the pointer, you can slide and hold it to the left and right or up and down. Then you can found it how to make the shape looks what you want.
You can also change the axis of the object. Just click where you want to put the axis. For example mine (the second image), i put it there and when you start using scale , it will following the axis.

It also applied in Rotate Tool. Look! My object is following the axis.
L5: Warp

You can find the Warp Tool on the left side. And there are choices of warp tool that you can use. You can make it like this:

Tried your own wrap tool ;-)
For the homework, sir Em asked us to do L7-L12. It's about using the Pen Tool that you can find on the left side. This is what I've done:
L7: Pen Closed Shape


You just have to follow the arrow and the steps. The result will be like the orange line that sir Em have made.
L8: Pen Corners


L9: Pen Curves


L10: Pen Overview

L11: Pen Straight


L12: Tracing

Haha see, I need more exercises ;)
No comments:
Post a Comment